culinary flights of fancy

Home Cooking Adventures in Berkeley Heights


Leave a comment

Ancho and Guajillo Chili Pepper Chili with Beans, Beef, and Vegetables

chili.2 (2)

chili.5

Ancho and Guajillo Pepper Chili with Beef, Beans, and Vegetables:

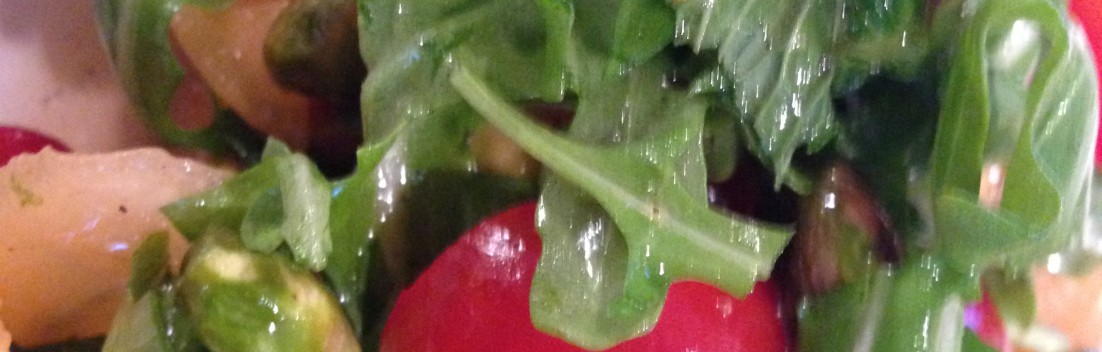
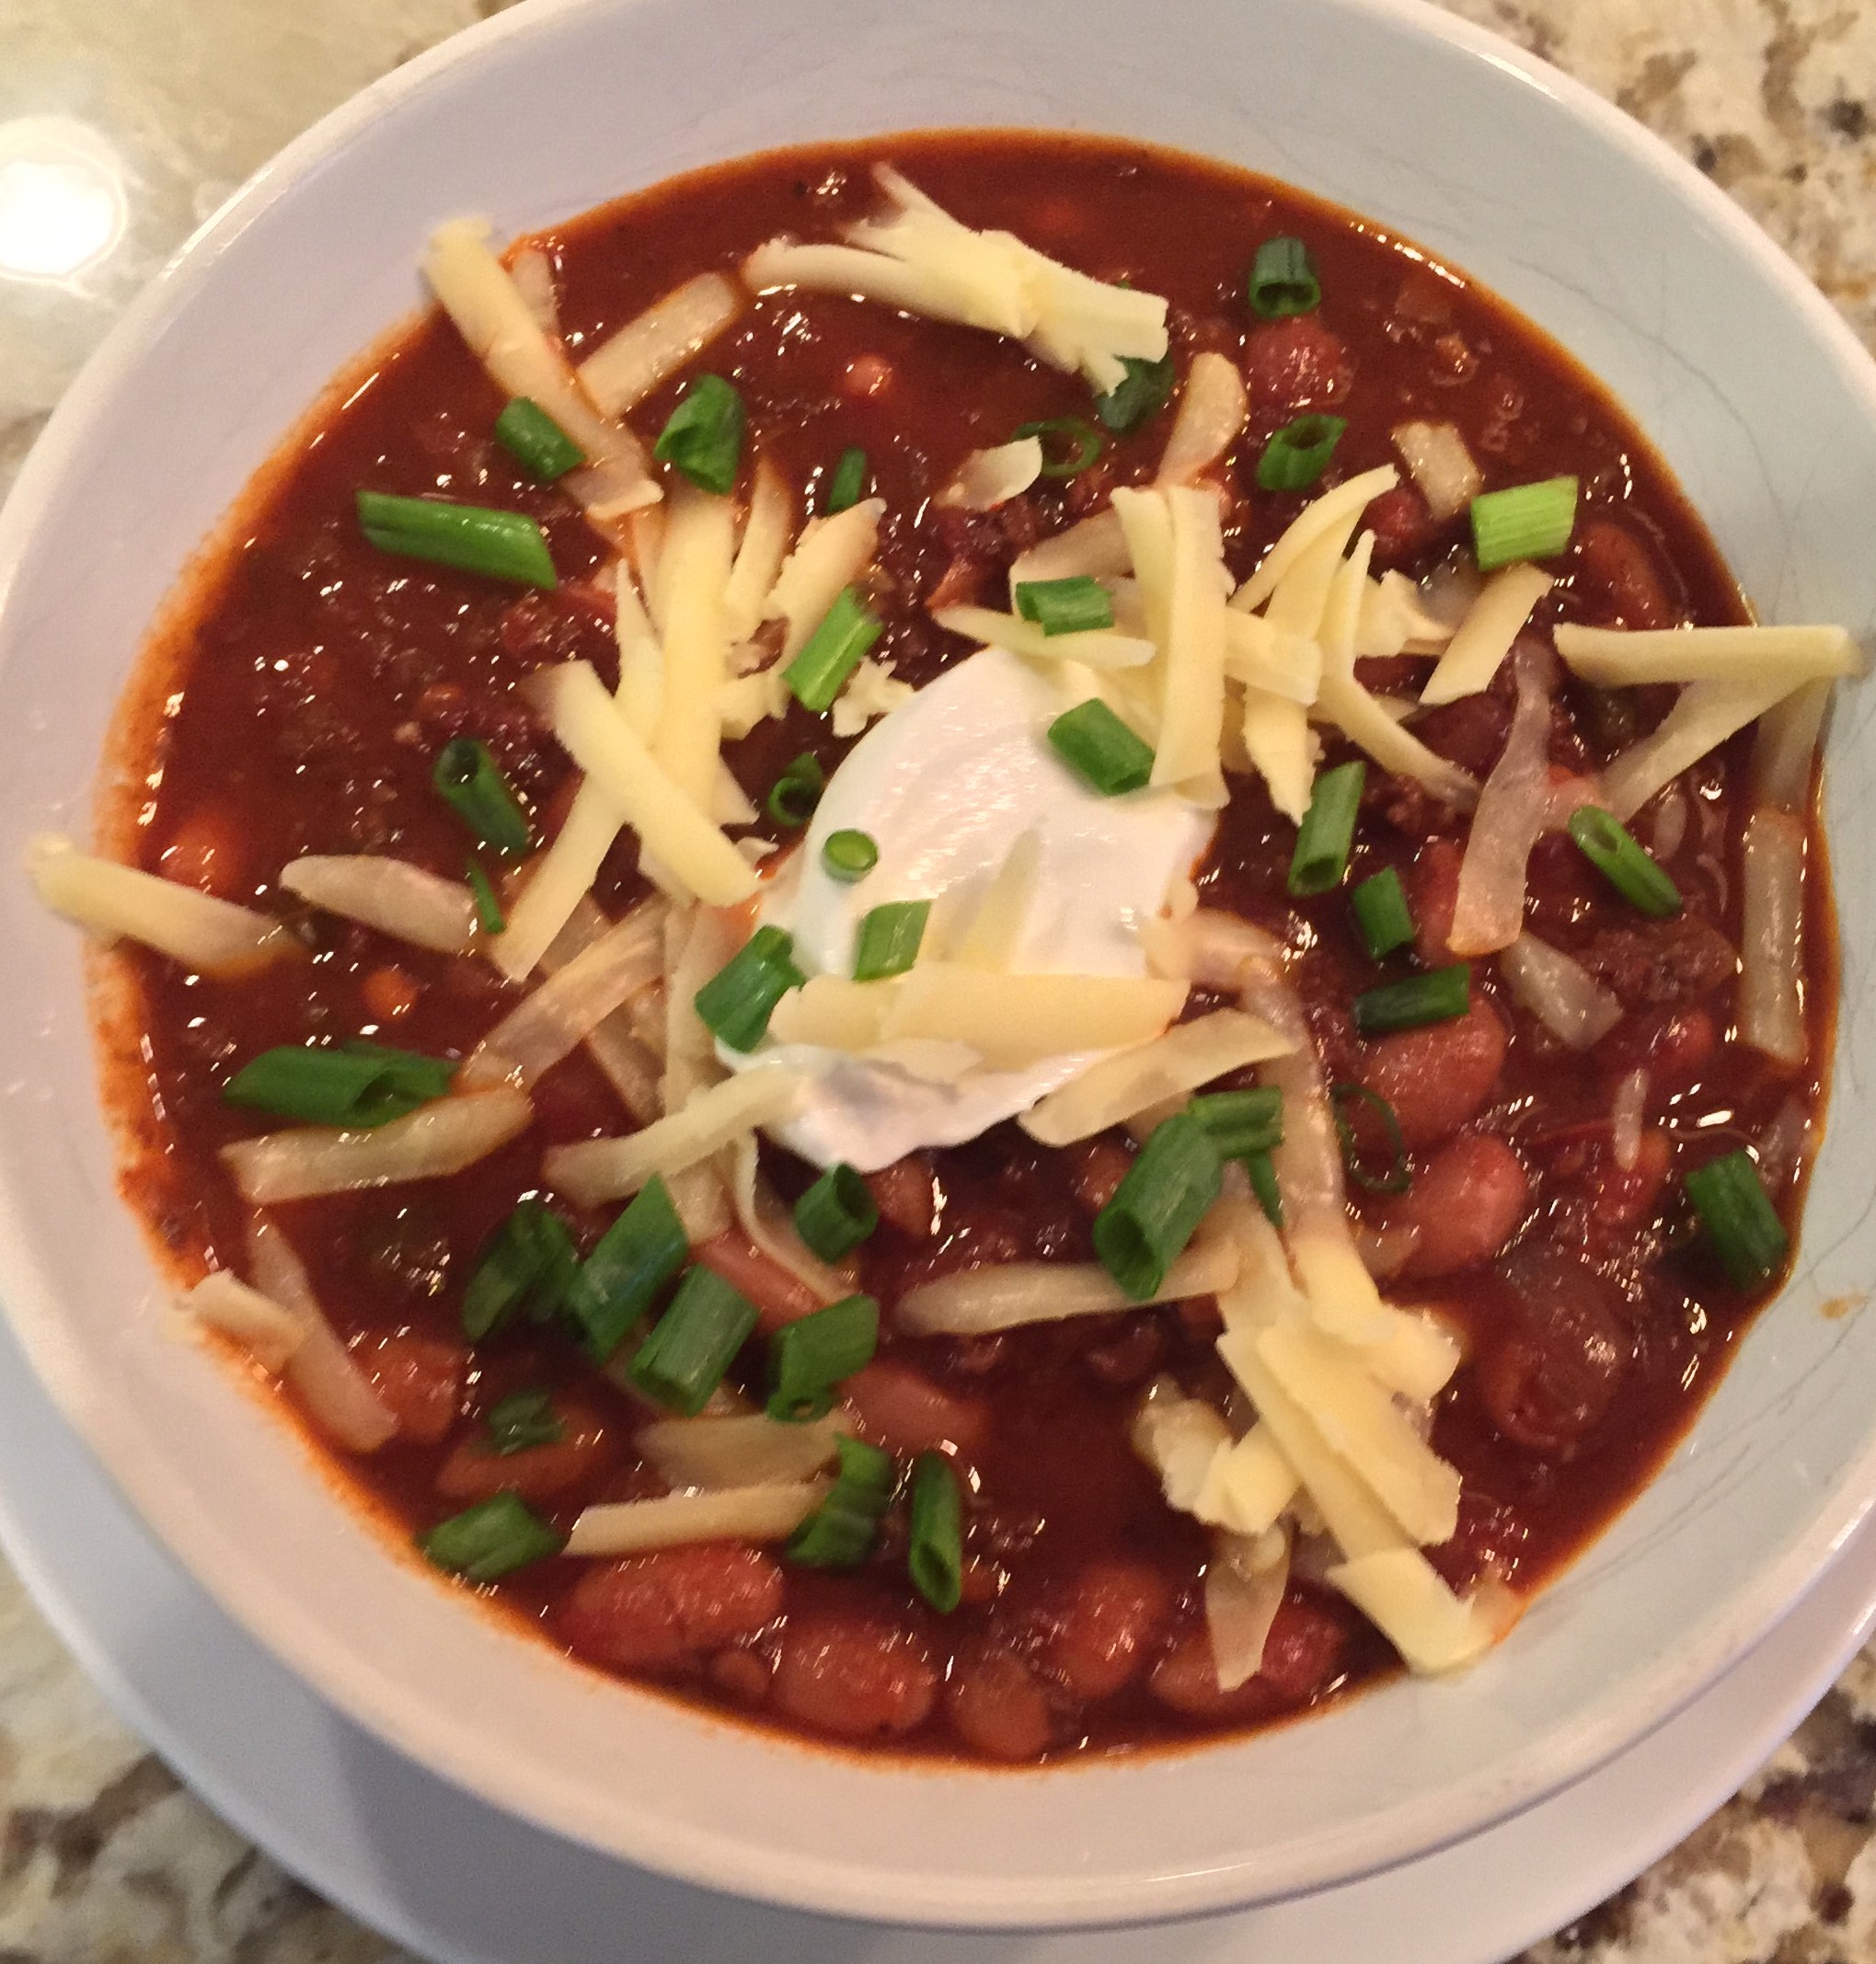
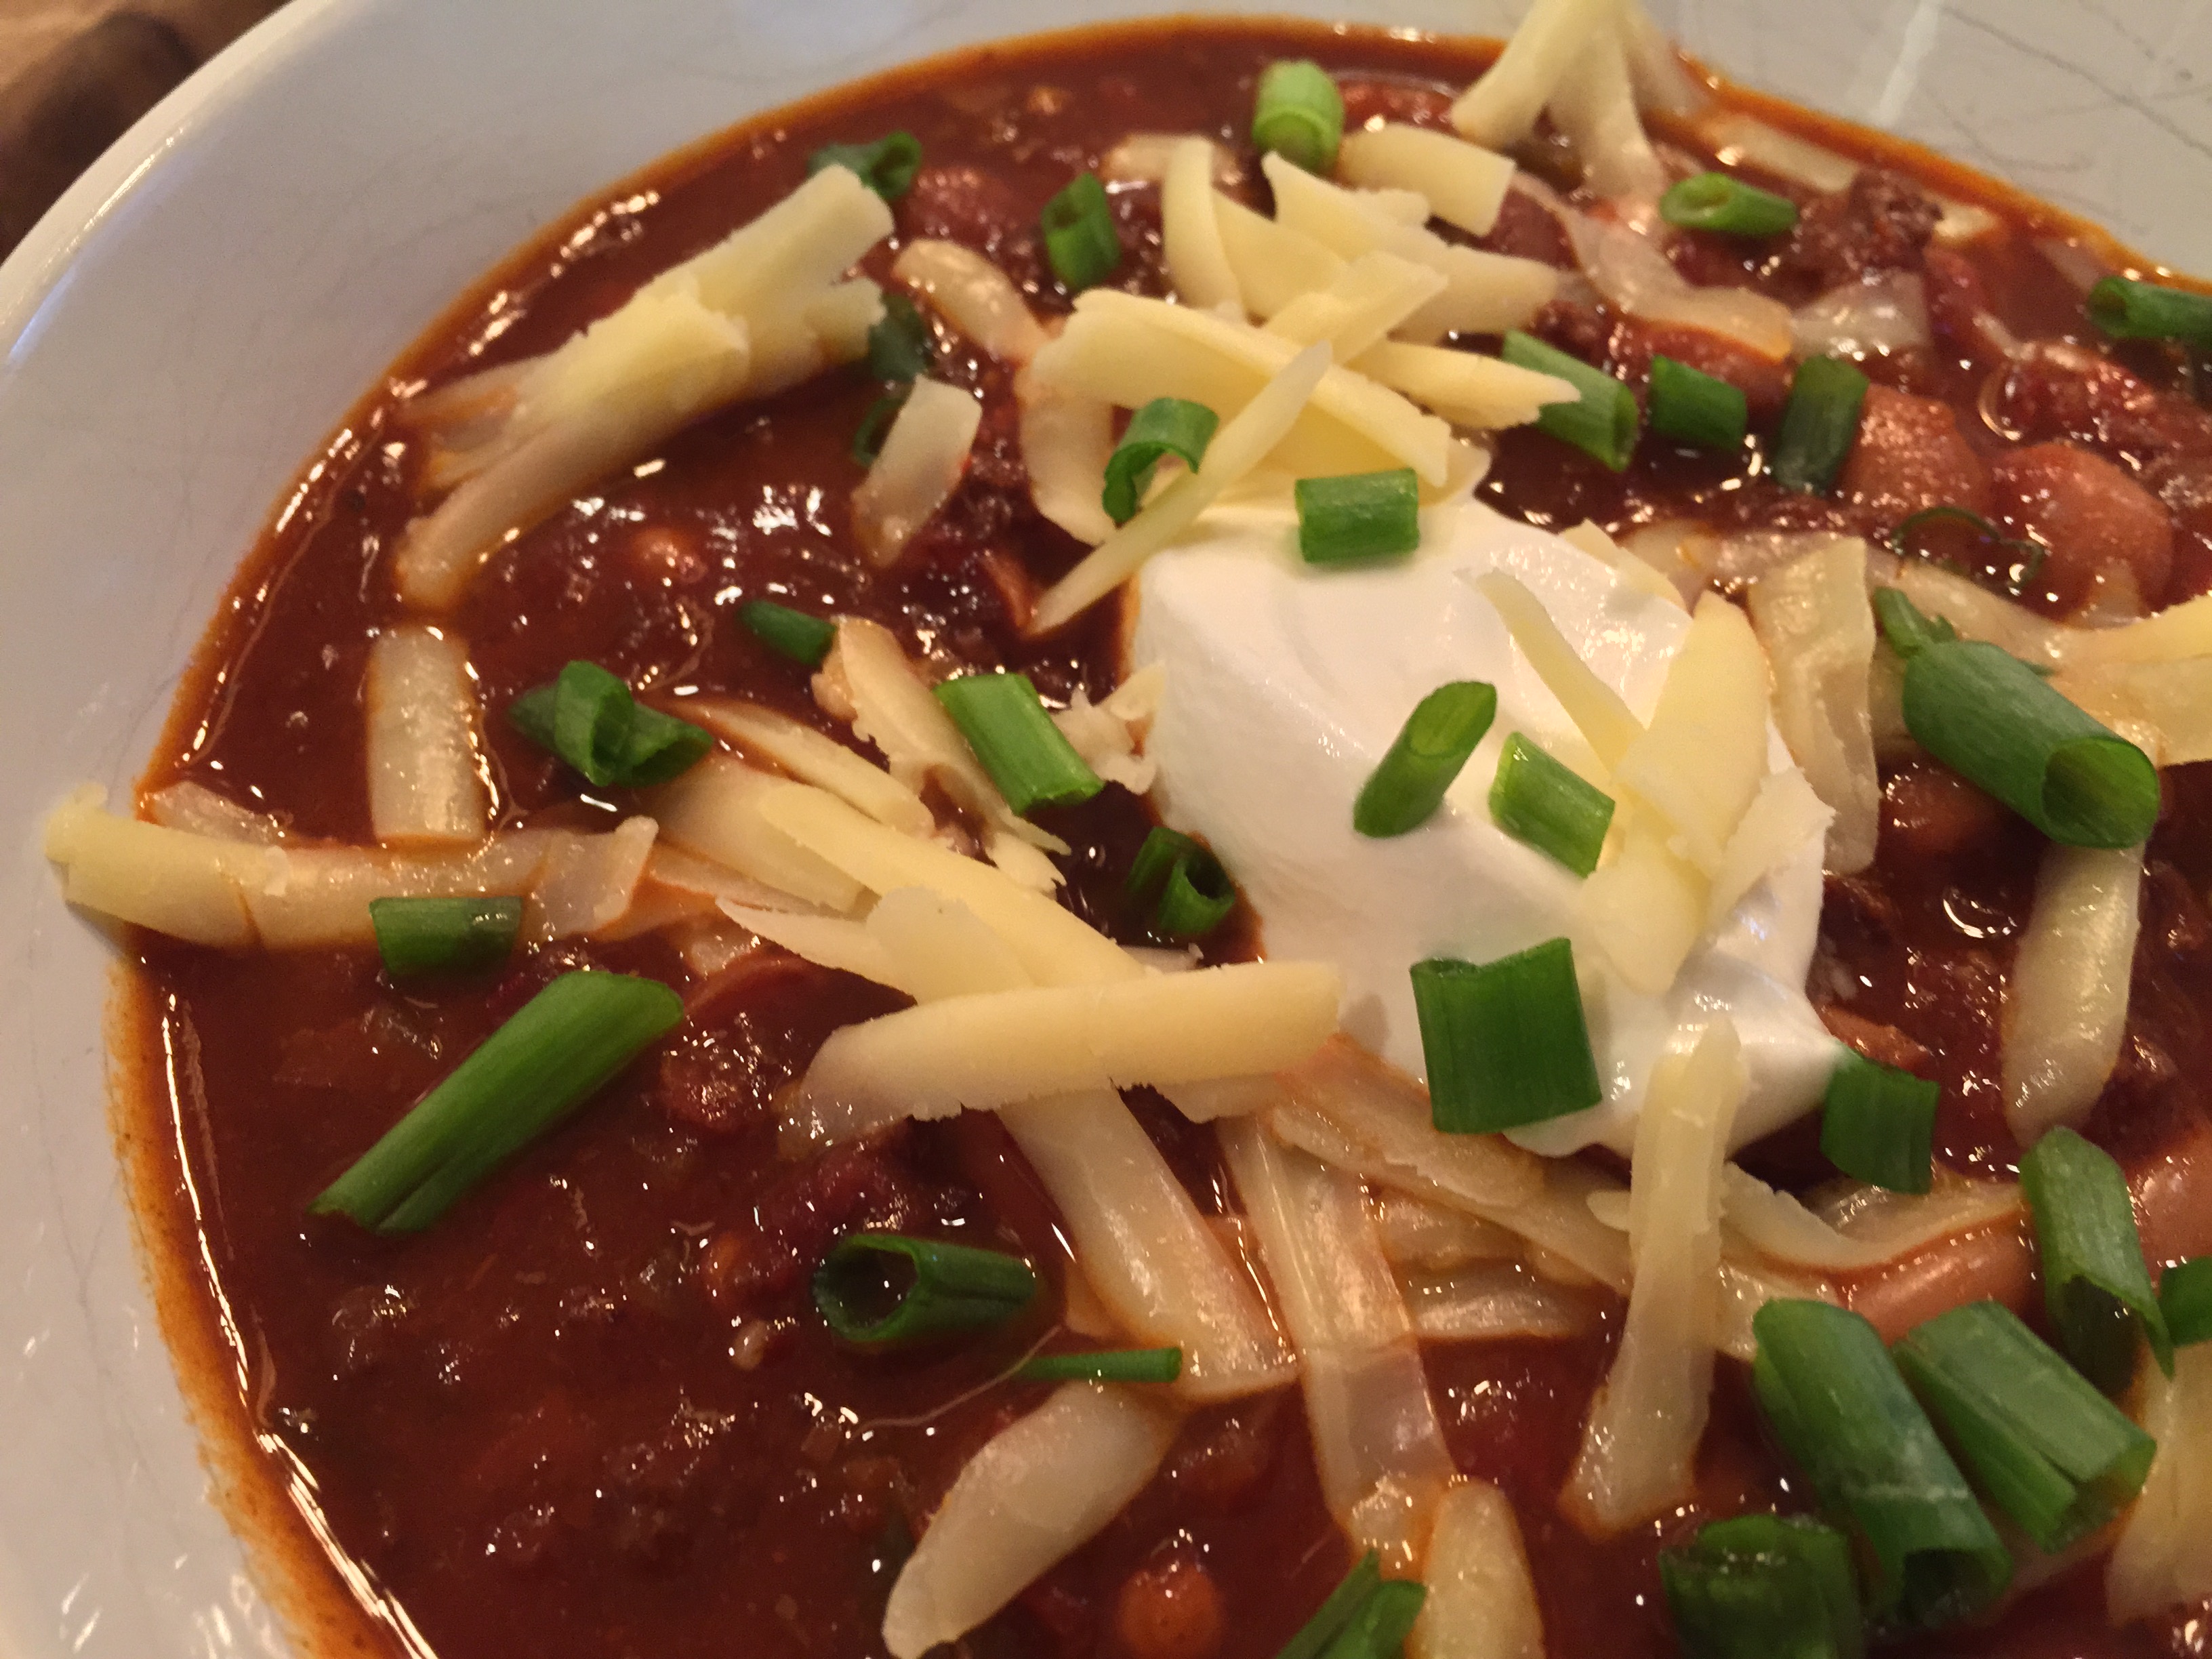
I really like chili and I really enjoy making it a couple times each year during the cool and cold weather months.  I love the spiciness of it and I love the fact that you can add a bit of this and a bit of that.   Many people prefer their chili simply cooked with dried spices, dried chili pepper powder, and ground beef.  Living in Texas for some time, I became well acquainted with this approach and while I like it, I don’t love it.  I much prefer beans in my chili and I certainly like the taste and health benefits they bring.  The beans, coupled with vegetables such as onions, bell peppers, and tomatoes make chili better for you and certainly more filling.  I typically couple the chili with corn bread and a small salad or some sort.  I almost always garnish with some grated cheddar cheese, chopped green onions, sour cream, and sometimes cilantro (though I didn’t use cilantro as a garnish here).

I basically made a straight forward chili recipe but I did one thing differently and I really liked the end result.  Instead of using chili powder as the main seasoning, I used whole dried chili peppers that I reconstituted in piping hot water and then ground them into a paste using a food processor.  As a result, the chili had a very deep chili flavor and a very deep crimson brown chili color.  I used both ancho and guajillo peppers, both of which are a mild to mild/spicy varieties.  I added a bit of cayenne pepper at the end to bring a bit more heat as I prefer a hotter chili.  I reserved the water that I reconstituted the peppers in so that I could add a bit of the flavored water as the chili simmered away.  Generally, I prefer my chili to be on the looser side rather than very thick.  I think the cheese and the sour cream end up adding thickness and body to the dish at the very end, so I tend to allow it to be not soupy, but sort of soupy if that makes sense.

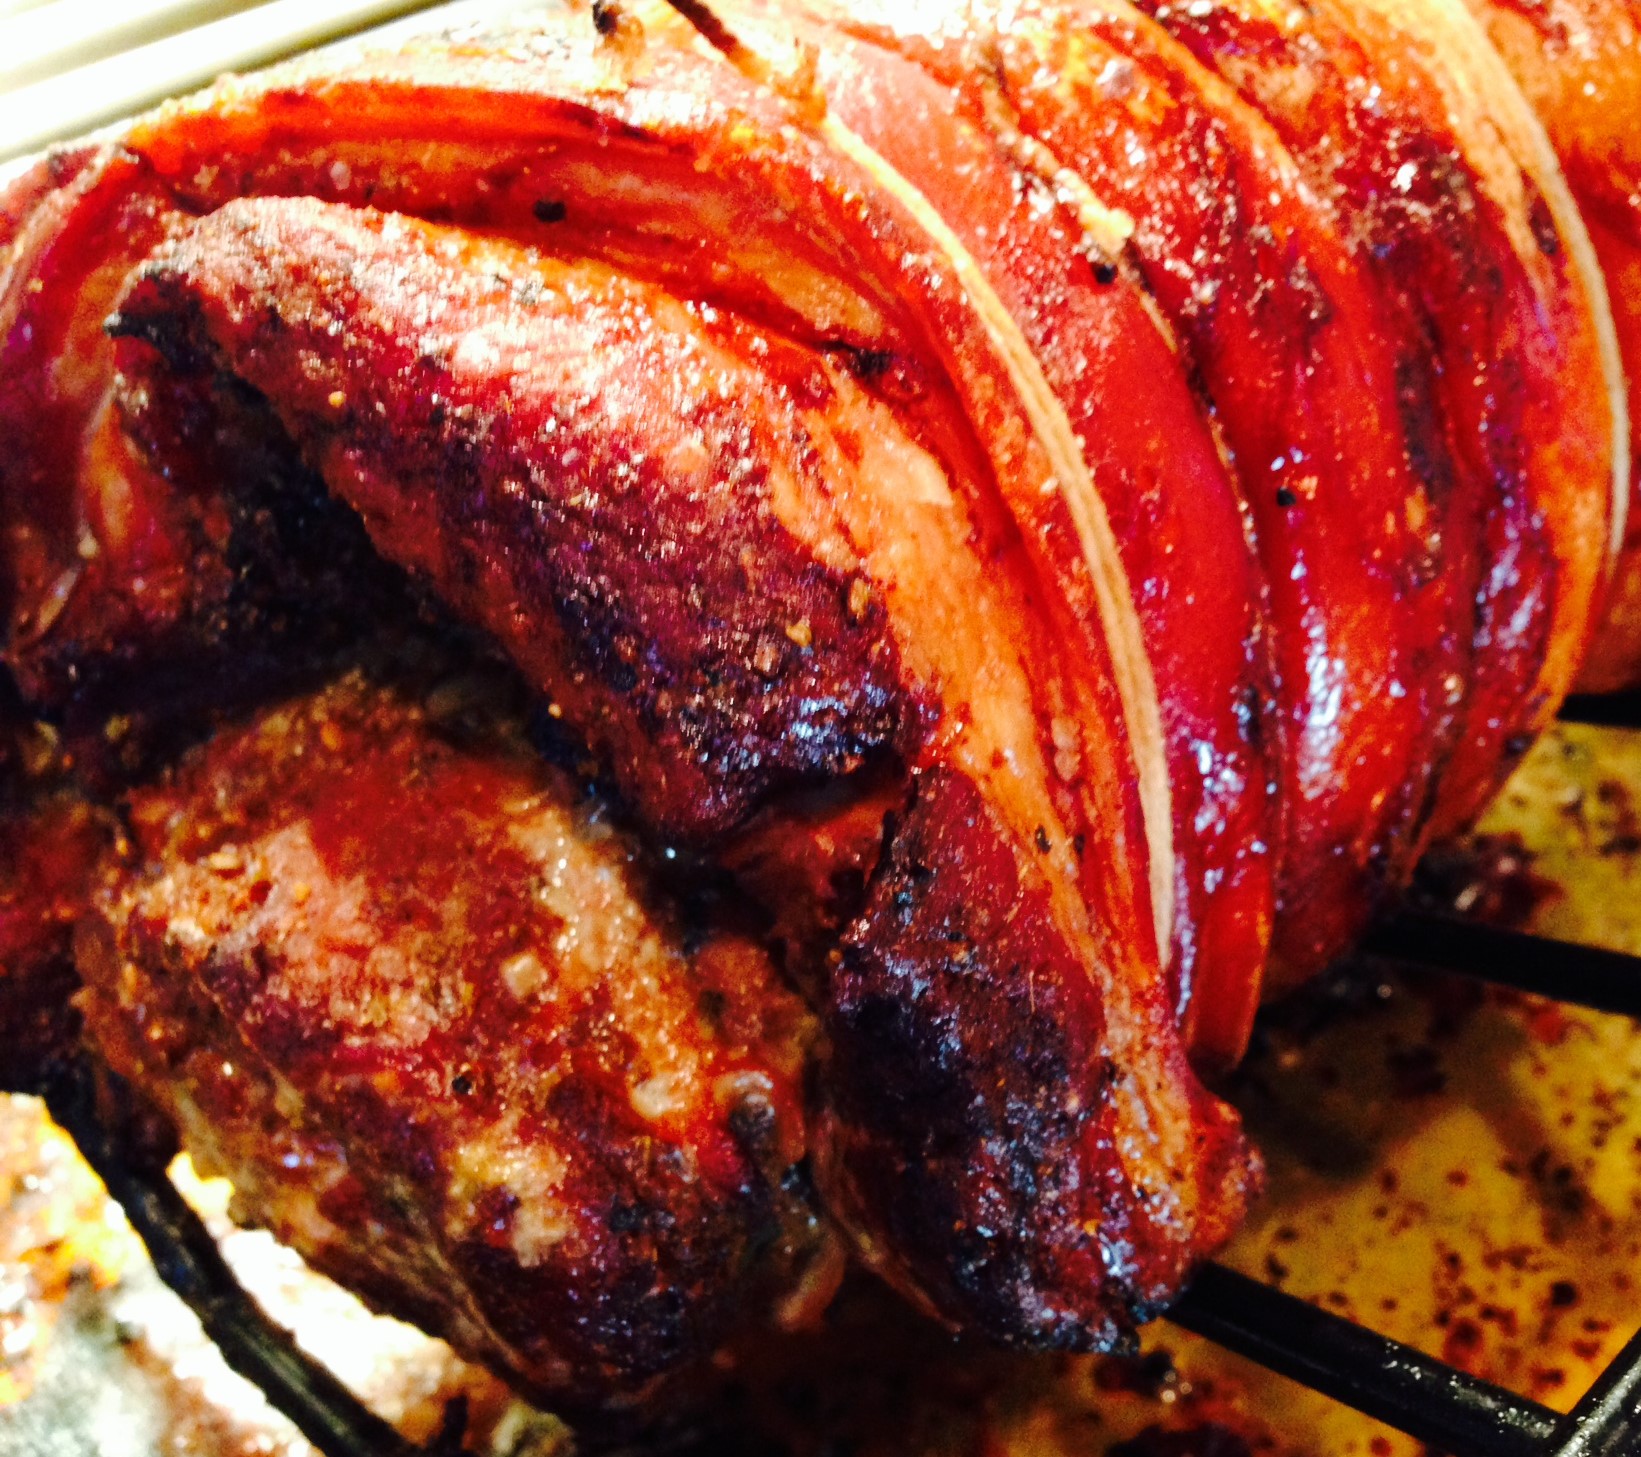
Of note with using the dried chilis in this manner is that it mitigated the dried powdery, paste-y taste that chili can sometime have due to all the powdered spices typically used.  Also of note, I used ground chuck and I ground the meat myself using a grinder attachment to our mixer.  I simply purchased a small chuck roast, cut it up into about 1 inch pieces, and then ran it through the grinder using the coarse grinder setting.  If you have the grinder attachment or a regular grinder, this is the perfect time to use it…it makes a huge difference in the texture and taste of the dish.

At any rate, I know lots of people have a preferred way to make chili, but here’s mine…at least my latest version.  Recipe follows after the jump! Continue reading


Leave a comment

Products Worth Mentioning: America Farm to Table By Mario Batali

My wife bought this book for me and I love it thus far.  I started reading it last week and it’s great.  I haven’t cooked a recipe from it yet but they look interesting and creative…exactly what you would expect from Mario Batali.  The best part of the book, however, is that contains anecdotes regarding farms and farmers from around the country.  The farm to table movement isn’t new but it has certainly gained steam in recent years and this book celebrates the farm, eating seasonally and locally produced food/ingredients, etc.  If you read this blog regularly you know that I’m a fan of farmer’s markets and getting ingredients as directly from the source as possible and that’s the reason I was interested in reading this book…and it doesn’t disappoint in that way.  At any rate, it’s a good read and certainly worth your time if you are interested in purchasing another cookbook.

…and a little housekeeping:  recipes for chili, a classic French apple tart straight from culinary school, apple butter, pita bread, and curing your own bacon are all forthcoming.  Winter vegetable salad is on the horizon as well.  Putting that out there will hopefully set expectations so that I can keep to a schedule and catch up on writing the recipes and getting them to you!  I’m woefully behind and I apologize for that.  This fall has been crazy busy…I’m not sure where the time goes but it certainly is moving quickly these days.  Anyway, stay tuned for new recipes and I hope all is well with everyone!


Leave a comment

Homemade Chicken Noodle Soup

ChickenNoodleSoup.2 (2)

I love making soup during the fall and winter months. I make soups of all kinds, using lots of different flavors, herbs, broths, and stocks to flavor each one a little differently. Chicken noodle soup is one of a few ‘go to’ soups that I make several times during the colder months. I’m not sure if it’s the nostalgia that I and most other people feel about the canned version during childhood but there’s definitely something about a great bowl of chicken noodle soup.

The good news about this soup is that it is pretty straightforward to make and if you happen to have chicken stock on hand, then it’s fairly quick. I make my own chicken stock and I make it by roasting a chicken, taking all the meat off the bones, and then using the bones to flavor the stock along with an assortment of herbs, vegetables, and spices. Usually I will make roasted chicken several times during the month and I freeze the bones. Once I reach two or three chickens, it’s then time for me to make more stock. If you do not have time to roast a chicken and so on, simply purchase a rotisserie chicken at your local grocery store, take the meat off the bones and go from there. If there’s not time to make stock, simply skip roasting the bones and simmering the soup for hours and make a broth using the bones, vegetables, and herbs. You can make a fairly flavorful broth in an hour to an hour in a half (whereas a stock could take upwards of six hours to really pull together). At any rate, there are options. I’m presenting this recipe as if you do not have chicken stock and will go step by step to making this soup completely from scratch. If you go this route, the soup will take the better part of the day to prepare. However, you won’t use all the stock you make for this one soup dish so you will have leftovers and stock freezes beautifully. So you can freeze it and make another meal or two from your homemade chicken stock anytime you’d like.  Recipe follows after the jump… Continue reading


Leave a comment

Charred Green and Red Tomato Salad

CharredTomatoes,3

Tomato season is almost at an end but if you are lucky, you can still find a few lingering green tomatoes at the market along with some very ripe red tomatoes.  That combination is perfect for an end of season tomato salad to enjoy the last bit of summer and early fall before it gives way to colder weather and winter vegetables.

This salad is so simple; it has just a few ingredients and takes no time to prepare.  However, the flavors are intense with a mix of the tartness of green tomatoes coupled with the bright sweet and acidic flavors of the red tomatoes.  Simply char the tomatoes, toss them with good quality extra virgin olive oil, tear some basil or a mix of herbs of your choosing, and season to taste with flaky sea salt and red pepper flakes.  I don’t feel the salad even needs vinegar or some other form of acid as the tomatoes themselves provide that.  However, a splash of sherry vinegar or balsamic vinegar would work well here if you prefer it that way.

There are two keys to the salad.  One is to use a cast iron pan or griddle and heat it until it is piping hot so that you can achieve the char that adds the smoky caramelized flavor to the salad.  Secondly, usually it’s important to season ingredients prior to cooking, but in this instance the tomatoes need to be seasoned after they are charred as salt will bring out the juices, which we want to keep in the tomatoes until they are finished and are ready to be tossed together in the salad.  Otherwise, this couldn’t be easier, healthier, or more flavorful!

CharredTomatoes.1

Recipe follows after the jump…

Continue reading


Leave a comment

The Kitchn’s Cooking School

Just a quick ‘heads up’…

The Kitchn’s cooking school starts on Monday (10/6) and runs everyday for 20 days.  The Kitchn is a great food/cooking blog and one that I read quite often.  Their school consists of some sort of daily lesson that is emailed to you and you are given homework with each lesson to help hone your skills on specific topic areas.  I’m not sure what exactly to expect with this but I signed up as you never know what little tidbit you’ll pick up from something like this.  Anyway, if you are so inclined and would like to learn more about cooking including lessons on knife skills and other culinary school basics, you should definitely consider signing up.  Hey it’s free to boot!

As an aside, I am actually going to do this so if you sign up and have questions or would like to discuss, just message me here.  I hope at least some of you decide to do this!


1 Comment

Homemade Applesauce Using New Jersey Apples

Applesauce.2 (2)

Applesauce.3

Fall is here and the weather is actually feeling sort of fallish.  The farmer’s markets are slowing down with summer fare and the fall harvest is coming into full swing with winter squash, pumpkins, broccoli, greens, and of course, apples.  There are a ton of varieties of apples and I had no idea that so many were grown right here in the Jerz.  In the coming weeks, I plan on writing a good number of recipes with apples AND I may dust off my culinary school cookbook and actually make a proper apple tart.

Anyway, applesauce:  one thing that kids and adults both love is applesauce.  Store bought applesauce is nothing like homemade applesauce, however.  I had never really made applesauce until a few years back when my Mother-in-Law, Kay, made it for my wife and I while we visited them.  As it turns out, applesauce is one of my wife’s favorite things and she asked me to pay attention as Kay went about making hers.  I can’t remember the differences between how I make mine now and what she does with hers, but the process is still about the same.  You cut apples, toss them with a bit of liquid, spice and flavor them as you prefer and slowly cook them on relatively low temperature until they sort of fall apart and become a unified sauce.

You can peel your apples and make it very smooth.  However, I choose to keep the peels on and keep the applesauce itself rather chunky when compared to the store bought version.  I’ve made applesauce a good number of times and usually it turns out great…usually.  I’ve messed a few of them up by adding too much of this or that and then the spices sort of overwhelm the taste of the apples.  So, restraint is important here…at least for me.  I’ve made this very plain with just a sweetener and a bit of cinnamon which would probably be great for most kids.  I’ve also made a much more complex tasting applesauce with ground ginger, baking spices such as nutmeg and cardamom…even a dash of cayenne pepper.

My go to, though, is the basic recipe that follows below.  It’s simple and yet has enough spice to keep it interesting.  I flavored this batch with cinnamon, vanilla bean, lemon juice, nutmeg, honey, and a dash of both water and salt.  I used a variety of apples (which I think works best as the texture benefits from the differences among the varieties of apples).  I always make sure I use Granny Smith apples as they have the tartness I prefer but from there, anything goes.  Do what I do:  simply go to the market and ask which ones are best and ask for a variety of sweet and tart to combine together.  Depending on the size batch you want to make, you are probably going to shoot for around 8-10 medium sized apples.  The good news is that you simply rough chop the apples so it goes rather quickly.  I think simmering the apples on low/simmer for about 30 minutes or so will be all that’s necessary.  However, it will vary depending on the amount of apples used.  If you make a batch in the 8-10ish apple range, you can expect about 1.5 quarts of applesauce.  You can scale up or down from there.

Hope you enjoy this…it’s very easy, very tasty, and extremely healthy!  The recipe follows after the jump.. Continue reading


1 Comment

Italian Sausage Meatballs with Broccoli Rabe in Jersey Tomato Mariana Sauce

SausageAndBroccoliRabe.2

A few weeks back I posted a recipe for my version of tomato sauce using Jersey tomatoes.  At the same time, one of our neighbors posted something on Facebook that she and her husband and extended family were all making large amounts of sauce.  I was interested and commented about it and then that afternoon they came over with a freshly pressed jar of their family recipe for tomato sauce.  I was very excited to receive the sauce as I thought it was very cool that a family has a tradition of making sauce and preserving the vegetables of summer together.  So, I was excited to try it and as such, I used that sauce for this dish…it was very tasty btw.  However, if you made the sauce from a few weeks ago, you can certainly use that or simply take a good quality can of tomatoes and crush them and simmer them slowly over a low flame with some garlic, olive oil, salt, basil, and red pepper flake and you will have a great sauce in a matter of minutes.  Either way, you will need about a quart or so of tomato sauce as the meatballs are sort of braised for about a half hour or so in the sauce.

Also, in the pizza extravaganza post, I outlined a general recipe for making your own Italian sausage.  I used this recipe for the start of the Italian sausage meatballs.  If you don’t wish to make your own sausage per that recipe, you can certainly use store bought Italian sausage…just take the meat out of the casings and combine it all together with the rest of the ingredients and go from there.

Broccoli rabe is one of my more favorite vegetables.  It’s delicate yet firm and has a bit of a bitter taste.  I flash cooked it in a bit of water first and then added it to the sauce at the very end to finish.

You can go a number of different ways with the dish from here.  I simply served it with a bit of bread and we ate it as is.  However, tossing the sauce with some pasta would be great and it certainly would make a great Italian sandwich with a few roasted peppers and possibly some provolone cheese on a toasted piece of Italian bread or a bun.  Actually you could also make a pizza out of it too though the sauce would need to be thickened more than is pictured.  At any rate, I think you can see that there are a lot of options for this versatile dish.

As for the tomato sauce itself that I used here…thanks again (you know who you are).  I have your jar ready to roll; I simply haven’t gotten it back to you but will do so soon.

I hope you enjoy this dish as much as my wife and I did!  Recipe follows after the jump… Continue reading


1 Comment

Porchetta

IMG_0051 (2)


IMG_0052 (2)p


Sorry for the time in between posts…it’s been a busy couple of weeks with birthdays, a trip to Illinois for a class reunion, catching a bad cold, etc.  With all of that in the rear view at this point, I can safely say that I will get back into the swing of things!  Porchetta is a rolled Italian pork roast that combines both the pork loin and the pork belly.  It’s super delicious with a moist, spicy interior that is surrounded by the crispy skin of the belly.  Tomorrow I will post another Italian dish…tomato sauce with Italian sausage and broccoli rabe.  Ok, so this one is a special occasion sort of main course that takes a couple days.  However, despite the time it takes, it’s actually pretty straight forward.  I purchased both the pork loin and the pork belly from John’s Italian meat market.  I happen to have butcher’s twine so I didn’t need any.  However, if you need some, just let the butcher know what you are making and he or she will certainly give you some to tie everything together.  I used a recipe (which can be found here) and modified it a bit to suit my taste.  I omitted the orange rind/slices and added more garlic and red pepper flakes.  I also added more salt (probably a couple tablespoons more).

I followed the roasting directions exactly except that I took mine out about 30 minutes prior to when they suggested as mine was looking done.  As it turned out, that was a good call as it was definitely done and probably would have tasted overdone had I let it continue.  Definitely allow the porchetta to rest for at least thirty minutes…an hour would probably be better.

I served the porchetta at room temperature along with some blanched vegetables as this is a rich, heavy dish.  I didn’t serve it with a sauce but a stock and wine reduction would certainly work if you’d like.


IMG_0053 (2)